Saw a lovely sketch over at the Clean and Simple blog earlier today and felt inspired to ink Dasher up once again - some people may think it's a little early for Christmas cards but I like to make mine while I'm nice and relaxed and if I wait until December that's not going to be the case!
[Besides last year I posted cards off to Chile in the week of December and they got there mid February!! so all things considered I feel I'm pretty much on time this year....]
What I used:
Card: Very Vanilla, Cherry Cobbler, Holly Jolly DSP (retired).
Ink: Cherry Cobbler
Stamp sets: Contempo Christmas, Dasher
Tools and other fun stuff: Decorative label Punch, corner rounder, rhinestones.
Showing posts with label CAS. Show all posts
Monday, October 17, 2011
Friday, May 20, 2011
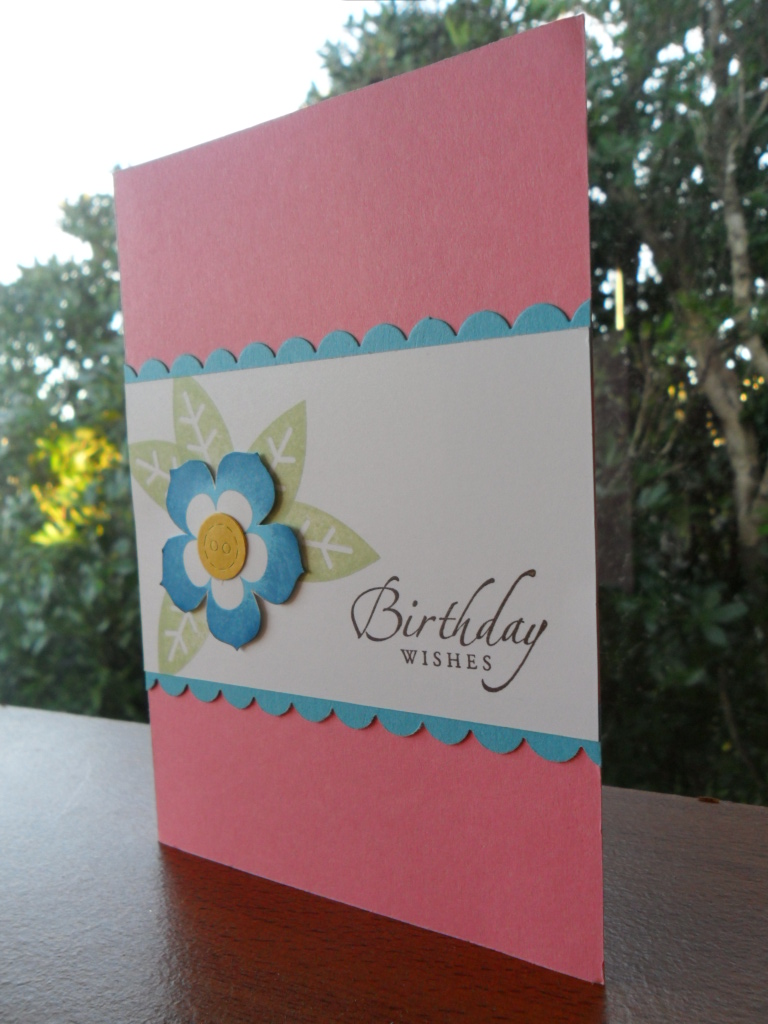
CAS Birthday card
Lovely sunny day here today so felt inspired to go looking for a challenge and found one at the Clean and Simple blog - hope you like it - pretty and feminine was the outcome today!
What I used:
Card: Regal Rose, Whisper White, Tempting Turquoise, Daffodil Delight
Ink: Tempting Turquoise, Pacific Point, Certainly Celery, Chocolate Chip
Stamp Sets: Petal Pizazz, Sincere Salutations
Tools and other fun stuff: Stamp-a-Majig, Stampin' dimensionals, Scallop Border punch. Buttons #5 Sizzlits die
What I used:
Card: Regal Rose, Whisper White, Tempting Turquoise, Daffodil Delight
Ink: Tempting Turquoise, Pacific Point, Certainly Celery, Chocolate Chip
Stamp Sets: Petal Pizazz, Sincere Salutations
Tools and other fun stuff: Stamp-a-Majig, Stampin' dimensionals, Scallop Border punch. Buttons #5 Sizzlits die
Tuesday, March 1, 2011
A few more "Thinking of You" cards
I have always loved this particular sheet of Haiku DSP (sadly retired) but was never quite sure what to do with it exactly so when I decided to feature DSP on my cards for Christchurch this one came to mind. I'm really happy how they turned out, they are super simple but quite striking too - love that Tangerine Tango!
Once again, I combined beautiful DSP with the bird punch, added a punched greeting and voilĂ ! I did emboss the bird and branch for a little bit of texture too.
What I used:
Card: Tangerine Tango, Old Olive, So Saffron, Whisper White, Haiku DSP (retired)
Ink: Chocolate Chip, Basic Black Stampin' Write marker.
Stamp Set: Sincere Salutations
Tools and other fun stuff: 2 Step Bird punch, Wide Oval punch, Scalloped Oval punch, Square Lattice embossing folder.
Once again, I combined beautiful DSP with the bird punch, added a punched greeting and voilĂ ! I did emboss the bird and branch for a little bit of texture too.
What I used:
Card: Tangerine Tango, Old Olive, So Saffron, Whisper White, Haiku DSP (retired)
Ink: Chocolate Chip, Basic Black Stampin' Write marker.
Stamp Set: Sincere Salutations
Tools and other fun stuff: 2 Step Bird punch, Wide Oval punch, Scalloped Oval punch, Square Lattice embossing folder.
Sunday, February 27, 2011
Bird Punch Play Date
Here is the second of the cards made for Christchurch. I'm also using this layout for as a Make and Take for my first "Craft and My Place" event on the 5th of March - if you live in Wellington and would like to come along that day, let me know so I can give the address details.
What I used:
Card: Tempting Turquoise, So Saffron, Real Red, Old Olive, Play Date DSP
Ink: Chocolate Chip, Basic Black Stampin' Write marker.
Stamp Set: Sincere Salutations
Tools and other fun stuff:: 2 Step Bird Punch, Scallop Border punch, Wide Oval Punch, Scallop Oval punch.
What I used:
Card: Tempting Turquoise, So Saffron, Real Red, Old Olive, Play Date DSP
Ink: Chocolate Chip, Basic Black Stampin' Write marker.
Stamp Set: Sincere Salutations
Tools and other fun stuff:: 2 Step Bird Punch, Scallop Border punch, Wide Oval Punch, Scallop Oval punch.
Friday, February 25, 2011
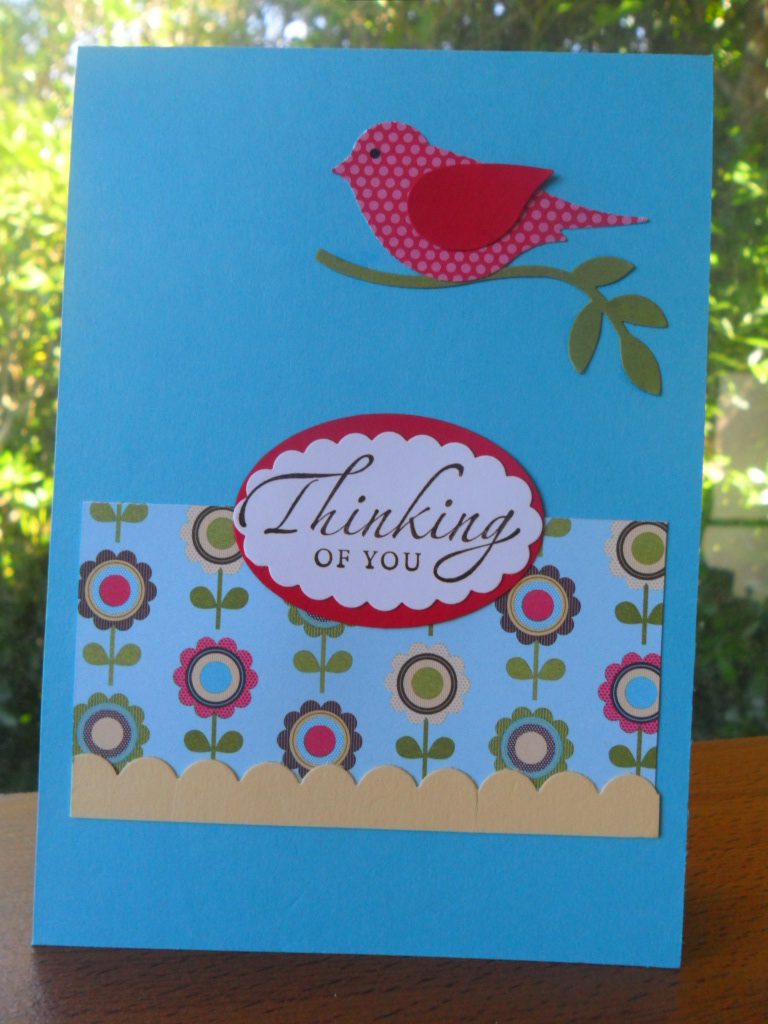
Thinking of You
Cardmakers are getting together and making cards to send to Christchurch to be distributed by Victim Support and though it seems such a little thing to do, I sincerely hope my cards bring a little peace to someone amidst the chaos down there at the moment. I sat at my desk and made some yesterday which I'll show to you over the next couple of days.
The following message came via the Just Add Ink blog:
"Victim Support are a group affiliated with the NZ police force and are trained in dealing everyday with adversity, helping and supporting people in need.
We thought they would appreciate some cards that they could write in and to take to victims of this devastating quake.
If you would like to do the same then you can send a home made card (blank inside with envelope if possible) to -
Victim Support
PO Box 2109
Christchurch
New Zealand
Thinking of you, get well soon, with sympathy or just a plain blank card would be appreciated"
I wanted to made a nice bright card so chose my favourite DSP called Play Date to feature in this card, and as Christchurch is the city of flowers thought it was very appropriate.
What I used:
Card: Tempting Turquoise, Read Red, Whisper White, Play Date DSP
Ink: Chocolate Chip
Stamp Set: Sincere Salutations
Tools and other fun stuff: Butterfly punch, Wide Oval punch, Scalloped Oval punch, Rhinestone.
The following message came via the Just Add Ink blog:
"Victim Support are a group affiliated with the NZ police force and are trained in dealing everyday with adversity, helping and supporting people in need.
We thought they would appreciate some cards that they could write in and to take to victims of this devastating quake.
If you would like to do the same then you can send a home made card (blank inside with envelope if possible) to -
Victim Support
PO Box 2109
Christchurch
New Zealand
Thinking of you, get well soon, with sympathy or just a plain blank card would be appreciated"
I wanted to made a nice bright card so chose my favourite DSP called Play Date to feature in this card, and as Christchurch is the city of flowers thought it was very appropriate.
What I used:
Card: Tempting Turquoise, Read Red, Whisper White, Play Date DSP
Ink: Chocolate Chip
Stamp Set: Sincere Salutations
Tools and other fun stuff: Butterfly punch, Wide Oval punch, Scalloped Oval punch, Rhinestone.
Monday, February 7, 2011
Navy and Red thanks
I had a reasonably quiet week in the crafting department last week so this morning I decided I'd try a new technique that was showcased in one of Stampin' Up!s demonstrator magazines a couple of months ago, called "Faux Silk". I used the latest Clean and Simple sketch as my inspiration.
It involves stamping an image on tissue paper, crumpling, smoothing, glueing, etc. I think the tissue I chose was a little too fine as you can barely see it, but still, it was good to try it out. I've attached photos of the process as well in case you were interested in trying it. I will definitely try it again but with gift wrap tissue which is slightly thicker than what I had on hand this morning.
Do you know I've given this little girl a name? It just seemed a little sad to be referring to her as 'the little girl' so from now on she will be knows as Emily on my blog! Don't ask me why I chose that name, it just popped into my mind, slightly old-fashioned perhaps? She looks like an Emily to me anyway LOL! And don't worry, I won't be naming all my other stamps!
First stamp your image on tissue and prepare a base for it to be glued to.
Crumple up your stamped tissue paper.
Smooth it out, but not too much, you want those wrinkles, really!
Roughly cut it to size, allowing for an overhang to tuck around the back
Apply glue to the base with your glue stick - I have sponged around the background with Riding Hood Red - just experimenting, again!
Carefully lay the image on the base and smooth it out - I think this is where I went wrong because I smoothed it out too much, removing all the wrinkles...
When happy with the front, turn over and apply more glue with your glue stick to the back and start glueing down the overhang.
Finished back, no one will see this part!
Finished 'medallion' ready for your use.
What I used:
Card: White, Night of Navy
Ink: Riding Hood Red, Night of Navy
Stamp sets: Easter Blossoms, Sincere Salutations
Tools and other fun stuff: Stamp-a-ma-jig, glue stick, Stampin' Sponges, non SU circle and scallop dies/templates.
It involves stamping an image on tissue paper, crumpling, smoothing, glueing, etc. I think the tissue I chose was a little too fine as you can barely see it, but still, it was good to try it out. I've attached photos of the process as well in case you were interested in trying it. I will definitely try it again but with gift wrap tissue which is slightly thicker than what I had on hand this morning.
Do you know I've given this little girl a name? It just seemed a little sad to be referring to her as 'the little girl' so from now on she will be knows as Emily on my blog! Don't ask me why I chose that name, it just popped into my mind, slightly old-fashioned perhaps? She looks like an Emily to me anyway LOL! And don't worry, I won't be naming all my other stamps!
First stamp your image on tissue and prepare a base for it to be glued to.
Crumple up your stamped tissue paper.
Smooth it out, but not too much, you want those wrinkles, really!
Roughly cut it to size, allowing for an overhang to tuck around the back
Apply glue to the base with your glue stick - I have sponged around the background with Riding Hood Red - just experimenting, again!
Carefully lay the image on the base and smooth it out - I think this is where I went wrong because I smoothed it out too much, removing all the wrinkles...
When happy with the front, turn over and apply more glue with your glue stick to the back and start glueing down the overhang.
Finished back, no one will see this part!
Finished 'medallion' ready for your use.
What I used:
Card: White, Night of Navy
Ink: Riding Hood Red, Night of Navy
Stamp sets: Easter Blossoms, Sincere Salutations
Tools and other fun stuff: Stamp-a-ma-jig, glue stick, Stampin' Sponges, non SU circle and scallop dies/templates.
Wednesday, February 2, 2011
Clean and Simple Stripes
I saw this sketch here a couple of days ago and the stripes appealed to me so thought I'd try it out.
Now, what I've learnt with challenges is that the earlier you join in the more scope as far as ideas you have as you always like to come up with something a little different. As of yesterday I hadn't seen anyone use the Stampin' Around Wheels to make their card so I thought I'd use them as they are ideal for making stripes of designs.I'm really pleased how the overall design turned out, hope you like it too.
What I used:
Card: Chocolate Chip, Riding Hood Red, Pumpkin Pie, So Saffron, Whisper White
Ink: Chocolate Chip, Riding Hood Red, Pumpkin Pie, So Saffron
Stamp Sets: Vine and Blossom Wheel, Fresh Cuts
Tools and other fun stuff: Stampin' sponges, Stampin' Around standard wheel handle, ruler, adhesive, cutting mat and craft knife.
Now, what I've learnt with challenges is that the earlier you join in the more scope as far as ideas you have as you always like to come up with something a little different. As of yesterday I hadn't seen anyone use the Stampin' Around Wheels to make their card so I thought I'd use them as they are ideal for making stripes of designs.I'm really pleased how the overall design turned out, hope you like it too.
What I used:
Card: Chocolate Chip, Riding Hood Red, Pumpkin Pie, So Saffron, Whisper White
Ink: Chocolate Chip, Riding Hood Red, Pumpkin Pie, So Saffron
Stamp Sets: Vine and Blossom Wheel, Fresh Cuts
Tools and other fun stuff: Stampin' sponges, Stampin' Around standard wheel handle, ruler, adhesive, cutting mat and craft knife.
Saturday, January 22, 2011
Eastern Blooms for a friend
Hi again! Hope your weekend has started well. Carlos has been busy this morning finishing off the first coat of paint on the house as they have announced heavy rains for later today, it's looking rather grim out there right now actually, dark clouds everywhere.... good day for crafting though!
I've just finished this card 10 minutes ago, I followed another Clean and Simple sketch AND a Color Lab challenge as well - this is incredible! From being totally fazed by sketches I've embraced them wholeheartedly - after all they take the hard work out of card making, which for me is coming up with new ideas all the time! ( Sorry Color Lab, I don't have any More Mustard ink but thought the Pumpkin Pie was a pretty good substitute in this case).
I really enjoyed making this card, I must use that {friend to friend} sentiment more often!
If you'd like to join me on my Facebook page click on this link - look forward to seeing you over there.
What I used:
Card: Pacific Point, Very Vanilla, Old Olive
Ink: Old Olive and Pumpkin Pie Stampin' Write markers, Old Olive ink pad.
Stamp Sets: Eastern Blooms, Teeny Tiny Sentiments.
Tools and other fun stuff: Large Ornament punch, Scalloped Edge punch, Stampin' Dimensionals, Stampa-ma-jig, Vintage Wallpaper embossing folder.
I've just finished this card 10 minutes ago, I followed another Clean and Simple sketch AND a Color Lab challenge as well - this is incredible! From being totally fazed by sketches I've embraced them wholeheartedly - after all they take the hard work out of card making, which for me is coming up with new ideas all the time! ( Sorry Color Lab, I don't have any More Mustard ink but thought the Pumpkin Pie was a pretty good substitute in this case).
I really enjoyed making this card, I must use that {friend to friend} sentiment more often!
If you'd like to join me on my Facebook page click on this link - look forward to seeing you over there.
What I used:
Card: Pacific Point, Very Vanilla, Old Olive
Ink: Old Olive and Pumpkin Pie Stampin' Write markers, Old Olive ink pad.
Stamp Sets: Eastern Blooms, Teeny Tiny Sentiments.
Tools and other fun stuff: Large Ornament punch, Scalloped Edge punch, Stampin' Dimensionals, Stampa-ma-jig, Vintage Wallpaper embossing folder.
Subscribe to:
Posts (Atom)