I made this with Keryn's Friday challenge in mind : Ducks!
I know it's pushing the boundaries a bit, but seeing as I don't own any duck images I thought I'd use this delightful bird instead.
And I finally figured out how to make the banner bow out in the centre - use a Dimensional under the middle part and glue down the two ends!
What I used:
Card: Baja Breeze, Crumb Cake, Very Vanilla
Ink: Soft Suede
Stamp Sets: Nature Walk, Teeny Tiny Sentiments
Tools and other fun stuff: Vintage Wallpaper EF, Scallop Border punch, Stampin' sponges, Stampin' Dimensionals, Vanilla Taffeta ribbon, Bakers' Twine, Basic pearls.
Showing posts with label Vintage Wallpaper Embossing Folder. Show all posts
Monday, November 28, 2011
Tuesday, November 8, 2011
Delightful Decorations
I was having a look over at Splitcoast Stampers yesterday and came across a couple of sketches that I thought would be great with the Delightful Decorations set - I'm always on the lookout for new ideas to use this set.
Afterwards I realised I sort of amalgamated two different sketches SC356 and SCS290 - but here is the result anyway.
I used the red 'sticky tape' to attach the glitter and it is just fabulous - nothing falls off it! I also run the 2-way pen around the circle of DSP and added some more glitter to that - what I meant to do and forgot was to add some gold cord to 'anchor' the decorations the the Top Note diecut.....
What I used:
Card: Riding Hood Red, Old Olive, Very Vanilla
Ink: Riding Hood Red, Old Olive
Stamp Set: Delightful Decorations
Tools and other fun stuff: Ornament punch, Top Note die, Vintage Wallpaper EF, 3/4" circle punch, sticky tape, MS Gold Glitter, 2 way pen.
Afterwards I realised I sort of amalgamated two different sketches SC356 and SCS290 - but here is the result anyway.
I used the red 'sticky tape' to attach the glitter and it is just fabulous - nothing falls off it! I also run the 2-way pen around the circle of DSP and added some more glitter to that - what I meant to do and forgot was to add some gold cord to 'anchor' the decorations the the Top Note diecut.....
What I used:
Card: Riding Hood Red, Old Olive, Very Vanilla
Ink: Riding Hood Red, Old Olive
Stamp Set: Delightful Decorations
Tools and other fun stuff: Ornament punch, Top Note die, Vintage Wallpaper EF, 3/4" circle punch, sticky tape, MS Gold Glitter, 2 way pen.
Friday, November 4, 2011
Emboss Resist Birthday
I had this idea in my head about how this card would work out but it wasn't quite to be - I don't think the clear embossing was thick enough as I was visualizing quite a contrast between the black and white embossed images, but I still like the end result.
What I used:
Card: White, Rose Red, Old Olive
Ink: Versamark Watermark ink, Rose Red, Old Olive, Basic Black
Stamp Sets: Easter Blossoms, Sincere Salutations
Tools and other fun stuff: Top Note die, Vintage Wallpaper EF, Clear embossing powder, black embossing powder, 1/4" white grossgrain ribbon, square rhinestone brad, stampin' sponges.
What I used:
Card: White, Rose Red, Old Olive
Ink: Versamark Watermark ink, Rose Red, Old Olive, Basic Black
Stamp Sets: Easter Blossoms, Sincere Salutations
Tools and other fun stuff: Top Note die, Vintage Wallpaper EF, Clear embossing powder, black embossing powder, 1/4" white grossgrain ribbon, square rhinestone brad, stampin' sponges.
Friday, September 16, 2011
Mini Christmas card plus NO shipping charges for Wellington crafters!
These Christmas images are really darling to watercolour, this little penguin is from the same set at the snowman featured on this card. So easy to do, just stamp, colour in and you're done! A little glitter for that added festive cheer and you don't even need a greeting on this one.
IGNORE THAT $9.95+ SHIPPING CHARGE THIS WEEKEND...!
If you live in Wellington I am offering to pay for your shipping charges on your Stampin' Up! order placed between today and Sunday evening (18th Sept). Why you may well ask? Well, lots of reasons: it's a beautiful day today, the All Blacks are playing their second game and it's National Day in Chile on Sunday18th September - people there usually get a bonus in their pay packet on this day, so you get free shipping as your bonus :)
PLUS if you live in North Wellington I'll even drop it off at your house, other areas of Wellington you are most welcome to come and collect your order when it arrives. Just email your order though to me at frances.poff@hotmail.com and I'll put it through for you.
Anyway, back to my card - it is 3"x3" and turned out rather cute I think!
What I used:
Card: Black, White, Melon Mambo, Baja Breeze
Ink: Black, Riding Hood Red, Pumpkin Pie, Baja Breeze
Stamp Set: Big Bold Birthday (retired), Punch Pals.
Tools and other fun stuff: Scalloped Border punch, Vintage Wallpaper EF, glitter.
IGNORE THAT $9.95+ SHIPPING CHARGE THIS WEEKEND...!
If you live in Wellington I am offering to pay for your shipping charges on your Stampin' Up! order placed between today and Sunday evening (18th Sept). Why you may well ask? Well, lots of reasons: it's a beautiful day today, the All Blacks are playing their second game and it's National Day in Chile on Sunday18th September - people there usually get a bonus in their pay packet on this day, so you get free shipping as your bonus :)
PLUS if you live in North Wellington I'll even drop it off at your house, other areas of Wellington you are most welcome to come and collect your order when it arrives. Just email your order though to me at frances.poff@hotmail.com and I'll put it through for you.
Anyway, back to my card - it is 3"x3" and turned out rather cute I think!
What I used:
Card: Black, White, Melon Mambo, Baja Breeze
Ink: Black, Riding Hood Red, Pumpkin Pie, Baja Breeze
Stamp Set: Big Bold Birthday (retired), Punch Pals.
Tools and other fun stuff: Scalloped Border punch, Vintage Wallpaper EF, glitter.
Thursday, September 8, 2011
My first ever 21st birthday card!
My daughter has just turned 21 and I had lots of fun making her card - and she loved it too!
I got the "Artistic Etchings" set specially for this occasion, firstly because of the keys, and secondly because we hope to go visit Paris one day!
And I guess I'd better share the card her 4 year-old brother made for her too - she had requested a card with purple and butterflies, so between both cards we managed to get all requests covered....
What I used:
Card: Rich Razzleberry, Very Vanilla
Ink: Soft Suede, Rich Razzleberry
Stamp Sets: Artistic Etchings
Tools and other fun stuff: Vintage Wallpaper embossing folder, Top Note die, Stampin' Sponges, Stampin' Dimensionals.
And what little brother used:
Card: Non SU - one day he'll be allowed to use it!
Ink: Rich Razzleberry, Pacific Point, Pumpkin Pie
Stamp Sets: Butterfly Prints, Teeny Tiny Sentiments
I got the "Artistic Etchings" set specially for this occasion, firstly because of the keys, and secondly because we hope to go visit Paris one day!
And I guess I'd better share the card her 4 year-old brother made for her too - she had requested a card with purple and butterflies, so between both cards we managed to get all requests covered....
What I used:
Card: Rich Razzleberry, Very Vanilla
Ink: Soft Suede, Rich Razzleberry
Stamp Sets: Artistic Etchings
Tools and other fun stuff: Vintage Wallpaper embossing folder, Top Note die, Stampin' Sponges, Stampin' Dimensionals.
And what little brother used:
Card: Non SU - one day he'll be allowed to use it!
Ink: Rich Razzleberry, Pacific Point, Pumpkin Pie
Stamp Sets: Butterfly Prints, Teeny Tiny Sentiments
Monday, August 29, 2011
Partial embossing Beautiful Butterfly
Last week we learnt how to do partial embossing at Keryn's team meeting and it was lots of fun. Thanks to Julie for the great tutorial, really enjoyed using all the fun tools involved in this process.
You really need a Big Shot machine to cope with the extra layers involved in this technique, a Cuttlebug machine is simply not strong enough to do this.
A couple of 'sneak peeks' as well in this card - the base card is a lovely new colour called Wisteria Wonder and the butterfly was cut out using a new DSP called "Just Add Cake".
What we used:
Card: Wisteria Wonder, Pink Pirouette, Just Add Cake.
Ink: Elegant Eggplant, Cherry Cobbler
Stamp Sets: Artistic Etchings, Butterfly Prints.
Tools and other fun stuff: Vintage Wallpaper embossing folder, Beautiful Butterflies Bigz die, Basic Pearls, Linen thread, Stampin' Sponges, Stampin' Dimensionals.
You really need a Big Shot machine to cope with the extra layers involved in this technique, a Cuttlebug machine is simply not strong enough to do this.
A couple of 'sneak peeks' as well in this card - the base card is a lovely new colour called Wisteria Wonder and the butterfly was cut out using a new DSP called "Just Add Cake".
What we used:
Card: Wisteria Wonder, Pink Pirouette, Just Add Cake.
Ink: Elegant Eggplant, Cherry Cobbler
Stamp Sets: Artistic Etchings, Butterfly Prints.
Tools and other fun stuff: Vintage Wallpaper embossing folder, Beautiful Butterflies Bigz die, Basic Pearls, Linen thread, Stampin' Sponges, Stampin' Dimensionals.
Monday, August 8, 2011
Soon to retire - Fresh Cuts
I thought I'd show you a few of the cards I've made during this year which use some of the retiring products. Today I've chosen the "Fresh Cuts" stamp set and there are different techniques on each card.
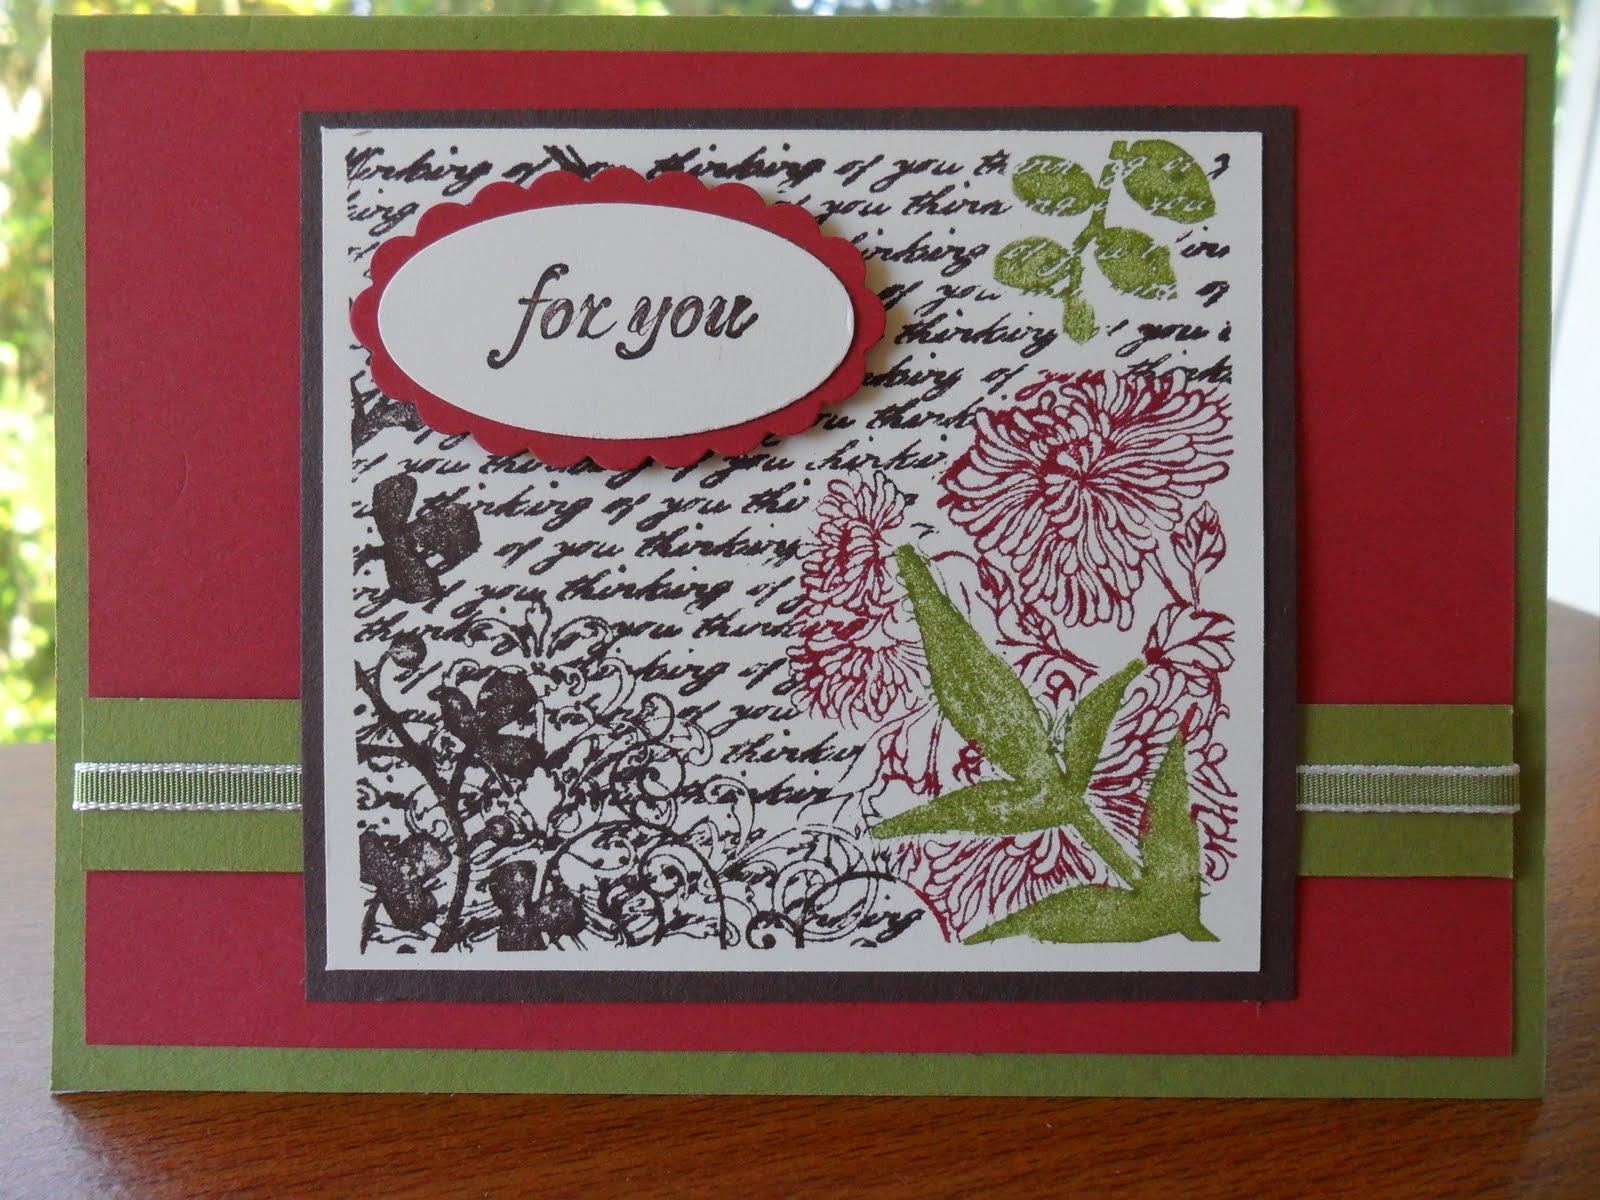
The Fresh Cuts set consists of 3 images and 2 sentiments: 'for you' and 'thank you'. The last card has a sentiment from Sincere Salutations, which has been carried over to the next brochure.
| For this card I applied different colours directly onto the stamp using Stampin' Write Markers in three different colours. |
| This time I stamped the image in Soft Suede on Very Vanilla and then used my Stampin' Write Markers to colour in selected parts of the image. |
| For this card I stamped the image in Versamark Watermark ink and then used a mix of black and gold embossing powders to heat emboss it. |
Card: Riding Hood Red, Old Olive, Chocolate Chip, Very Vanilla, Soft Suede, Pretty in Pink, Melon Mambo, Black, Crumb Cake
Ink: Chocolate Chip, Riding Hood Red, Old Olive, Soft Suede, Pretty in Pink, Versamark Watercolour ink.
Stamp Sets: Fresh Cuts ($35.21 for set of 5 stamps)m, Sincere Salutations ($47.95 for set of 8 stamps)
Tools and other fun stuff: Scallop Oval punch, Large Oval punch, Wide Oval punch, Scallop Border punch, 1/8" Old Olive Taffeta ribbon, gold embossing powder, black embossing powder, Vintage Wallpaper embossing folder, heat tool, Floral Fusion Sizzlits die, basic pearls.
Friday, August 5, 2011
Saying goodbye to Eastern Blooms
Here is the card I mentioned yesterday - my first attempt at a stenciled background. I had a few problems lining it up on the card front so in the end went for the 'tear it out' option so I could re-use the background.
I had to smile because I really have difficulty with this tearing technique, always afraid it's going to rip right through all the hard work! I guess one way around this would be to tear the cardstock first and then embellish, but in today's case it was more a matter of tearing to fix something that was not quite right... anyway, I faced my fears and did it, and am very pleased with the result.
Quite a lot of layering and punching, but it was fun.
What I used:
Card: Tangerine Tango, Old Olive, So Saffron, snippets of Cajun Craze, Riding Hood Red, Pumpkin Pie etc for the flowers.
Ink: Soft Suede, Old Olive
Stamp Sets: Eastern Blooms,
Tools and other fun stuff: Boho Blossoms punch, 1/8" Old Olive taffeta ribbon, Basic Pearls, Vintage Wallpaper embossing folder.
I had to smile because I really have difficulty with this tearing technique, always afraid it's going to rip right through all the hard work! I guess one way around this would be to tear the cardstock first and then embellish, but in today's case it was more a matter of tearing to fix something that was not quite right... anyway, I faced my fears and did it, and am very pleased with the result.
Quite a lot of layering and punching, but it was fun.
What I used:
Card: Tangerine Tango, Old Olive, So Saffron, snippets of Cajun Craze, Riding Hood Red, Pumpkin Pie etc for the flowers.
Ink: Soft Suede, Old Olive
Stamp Sets: Eastern Blooms,
Tools and other fun stuff: Boho Blossoms punch, 1/8" Old Olive taffeta ribbon, Basic Pearls, Vintage Wallpaper embossing folder.
Monday, July 18, 2011
A little bit of everything
Hi there - hope your day is going well.
I had stamped and punched out these butterflies intending to use them on the Matchbook Mini Album but then did not use them so I've found a proper home for them on today's card.
I love these butterflies, both the stamp set and punch, you just can't go wrong with them!
What I used:
Card: Soft Suede, Very Vanilla, Certainly Celery, Riding Hood Red, Old Olive.
Ink: Riding Hood Red
Stamp Sets: Butterfly Prints
Tools and other fun stuff: Butterfly punch, Bird punch, Very Vanilla 1/4" grosgrain ribbon, Scallop Border punch, Buttons sizzlits die, Vintage Wallpaper embossing folder, Rhinestones.
I had stamped and punched out these butterflies intending to use them on the Matchbook Mini Album but then did not use them so I've found a proper home for them on today's card.
I love these butterflies, both the stamp set and punch, you just can't go wrong with them!
What I used:
Card: Soft Suede, Very Vanilla, Certainly Celery, Riding Hood Red, Old Olive.
Ink: Riding Hood Red
Stamp Sets: Butterfly Prints
Tools and other fun stuff: Butterfly punch, Bird punch, Very Vanilla 1/4" grosgrain ribbon, Scallop Border punch, Buttons sizzlits die, Vintage Wallpaper embossing folder, Rhinestones.
Saturday, May 14, 2011
CASEd Nature Walk just for you
The other day I was having a look through some card-making blogs and came upon one called The Pursuit of Stampin'ess - I really liked her cards and decided to copy one to share with you today. I was wanting to try some of my Daffodil Delight cardstock and even though I lacked a few of her elements I made my own up - as you do!
I was quite amazed at how heavy the card turned out, but then counted the layers and it's 8 deep when you come to the little flower - no wonder it took me all morning to assemble ... crafting on and off whilst attending to family life... lots of fun making it though.
What I used:
Card: Daffodil Delight, Baja Breeze, Whisper White, Not Quite Navy
Ink: Not quite Navy, Baja Breeze
Stamp Sets: Nature Walk, Simply Said, Teeny Tiny Sentiments
Tools and other fun stuff: Vintage Wallpaper embossing folder, Word Window punch, Boho Blossoms punch, 1/4" punch, Stampin' Dimensionals.
I was quite amazed at how heavy the card turned out, but then counted the layers and it's 8 deep when you come to the little flower - no wonder it took me all morning to assemble ... crafting on and off whilst attending to family life... lots of fun making it though.
| Here is what I came up with - a few different elements but same colours, main stamp etc. |
What I used:
Card: Daffodil Delight, Baja Breeze, Whisper White, Not Quite Navy
Ink: Not quite Navy, Baja Breeze
Stamp Sets: Nature Walk, Simply Said, Teeny Tiny Sentiments
Tools and other fun stuff: Vintage Wallpaper embossing folder, Word Window punch, Boho Blossoms punch, 1/4" punch, Stampin' Dimensionals.
Thursday, May 5, 2011
Happy Birthday Keryn
Yesterday was Keryn's birthday and as I know she has already received this in the post I can show it to all of you now!
I received the latest Impressions magazine a few days ago and wanted to try out a new technique they showcased on the cover regarding mixing embossing powders to create a dappled effect. They used black and white but I chose to mix gold and black (you guessed it, I don't have white!) to try and recreate the effect. You may not be able to see the results too well in the photos but it did work and looks very nice. As I was using black and gold I decided to go for a vintage/shabby chic look so used Rose Red, Crumb Cake and a hint of black to finish off the card.
What I used:
Card: Very Vanilla, Black, Rose Red, Crumb Cake
Ink: Crumb Cake, Versamark Watermark.
Stamp Sets: Fresh Cuts, Sincere Salutations
Tools and other fun stuff: Floral Fusion Sizzlets die, Basic Pearls, Stampin' Dimensionals, gold embossing powder, black embossing powder, embossing buddy, heat gun, Scalloped Border punch, Scalloped Oval punch, Wide Oval punch.
I received the latest Impressions magazine a few days ago and wanted to try out a new technique they showcased on the cover regarding mixing embossing powders to create a dappled effect. They used black and white but I chose to mix gold and black (you guessed it, I don't have white!) to try and recreate the effect. You may not be able to see the results too well in the photos but it did work and looks very nice. As I was using black and gold I decided to go for a vintage/shabby chic look so used Rose Red, Crumb Cake and a hint of black to finish off the card.
| (Click on cards for larger view) |
What I used:
Card: Very Vanilla, Black, Rose Red, Crumb Cake
Ink: Crumb Cake, Versamark Watermark.
Stamp Sets: Fresh Cuts, Sincere Salutations
Tools and other fun stuff: Floral Fusion Sizzlets die, Basic Pearls, Stampin' Dimensionals, gold embossing powder, black embossing powder, embossing buddy, heat gun, Scalloped Border punch, Scalloped Oval punch, Wide Oval punch.
Sunday, April 3, 2011
Make and takes
I held my first stall at a school fair yesterday and it was a very interesting experience! Sold a few cards, had a couple of leads, I enjoyed it. (My typing is a little limited today so this will be brief!)
Here are the 'make and takes' I made for this occasion.
What I used:
Card: Cherry Cobbler, So Saffron, Very Vanilla
Ink: Old Olive, Pumpkin Pie, Cherry Cobbler
Stamp sets: Petal Pizazz, Teeny Tiny Sentiments, Butterfly Prints, Easter Blossoms (from Summer Mini)
Tools and other fun stuff: Scallop Circle punch, Butterfly Punch, Large Oval punch, Scalloped Oval punch, Vintage Wallpaper embossing folder, Basic Pearls, Rhinestones.
Here are the 'make and takes' I made for this occasion.
What I used:
Card: Cherry Cobbler, So Saffron, Very Vanilla
Ink: Old Olive, Pumpkin Pie, Cherry Cobbler
Stamp sets: Petal Pizazz, Teeny Tiny Sentiments, Butterfly Prints, Easter Blossoms (from Summer Mini)
Tools and other fun stuff: Scallop Circle punch, Butterfly Punch, Large Oval punch, Scalloped Oval punch, Vintage Wallpaper embossing folder, Basic Pearls, Rhinestones.
Thursday, March 3, 2011
Butterfly Love Letter
It's been a while since I last posted and my parents aren't even here yet! Too much going on this week plus a total lack of inspiration I feel has been to blame, but today I managed to get to my crafty corner and make a card. I had been meaning to use some more of my Love Letters DSP and in this card have combined that paper with the Buttlerfly Prints stamp set and am very pleased with the result.
And I was quite pleased how one of the Butterfly Prints actually matched the DSP houndstooth design!
I used quite a few techniques including heat embossing, dry embossing, sponging and background stamping.
What I used:
Card: Riding Hood Red, Very Vanilla, Crumb Cake, Love Letters DSP
Ink: Riding Hood Red, Crumb Cake, Versamark Watermark ink.
Stamp set: Butterfly prints
Tools and other fun stuff: Square Scallop punch, Butterfly Punch, Vintage Wallpaper embossing folder, Basic Pearls, Stampin' sponges, embossing heat tool, black embossing powder, Stampin' dimensionals.
And I was quite pleased how one of the Butterfly Prints actually matched the DSP houndstooth design!
I used quite a few techniques including heat embossing, dry embossing, sponging and background stamping.
What I used:
Card: Riding Hood Red, Very Vanilla, Crumb Cake, Love Letters DSP
Ink: Riding Hood Red, Crumb Cake, Versamark Watermark ink.
Stamp set: Butterfly prints
Tools and other fun stuff: Square Scallop punch, Butterfly Punch, Vintage Wallpaper embossing folder, Basic Pearls, Stampin' sponges, embossing heat tool, black embossing powder, Stampin' dimensionals.
Tuesday, February 8, 2011
Another thank you card
I was in need of a couple of thank you cards hence yesterday and today's posts - little 'Emily' once again has become the focus of today's card.
What I used:
Card: White, So Saffron, Riding Hood Red
Ink: So Saffron, Riding Hood Red.
Stamp Sets: Eastern Blossoms, Sincere Salutations
Tools and other fun stuff: Vintage Wallpaper embossing folder, Scallop Border punch, Scalloped Oval punch, Wide Oval punch, Stampin' Dimensionals, Stampin' sponges.
What I used:
Card: White, So Saffron, Riding Hood Red
Ink: So Saffron, Riding Hood Red.
Stamp Sets: Eastern Blossoms, Sincere Salutations
Tools and other fun stuff: Vintage Wallpaper embossing folder, Scallop Border punch, Scalloped Oval punch, Wide Oval punch, Stampin' Dimensionals, Stampin' sponges.
Sunday, January 30, 2011
A different take on Perfect Plum
Now, I'm a lot happier with this colour combination of Perfect Plum, Pear Pizzaz and Pretty in Pink, a lot more 'me' yesterday's one.
I found this colour combination on The Colour Dare's blog and thought it was really pretty, hope you like it. It is another watercoloured image, a very femenine image of a little girl on a swing. I used a combination of Stampin' Write markers and watercolour pencils to colour her in which seemed to work well, I thought perhaps one medium may bleed into the other one but it well very well I'm pleased to report.
Decisions, decisions, this is the cardstock in all three colours plus the coloured image.
I've changed plan already here as you can see! I opted to introduce the pear pizzazz in the form of the ribbon, and just left the pink in the coloured image.

Here is the final result, quite different from yesterday!
What I used:
Card: Perfect Plum, Very Vanilla, Watercolour paper
Ink: Pretty in Pink, Regal Rose and Certainly Celery Stampin' Write markers, Basic Black inkpad.
Stamp Sets: Basic Phrases, A Kind Word (retired)
Tools and other fun stuff: Vintage Wallpaper embossing folder, Pear Pizazz poly-stitched ribbon, Scallop Border punch, Word Window punch, watercolour pencils, aquabrush.
I found this colour combination on The Colour Dare's blog and thought it was really pretty, hope you like it. It is another watercoloured image, a very femenine image of a little girl on a swing. I used a combination of Stampin' Write markers and watercolour pencils to colour her in which seemed to work well, I thought perhaps one medium may bleed into the other one but it well very well I'm pleased to report.
Decisions, decisions, this is the cardstock in all three colours plus the coloured image.
I've changed plan already here as you can see! I opted to introduce the pear pizzazz in the form of the ribbon, and just left the pink in the coloured image.
Here is the final result, quite different from yesterday!
What I used:
Card: Perfect Plum, Very Vanilla, Watercolour paper
Ink: Pretty in Pink, Regal Rose and Certainly Celery Stampin' Write markers, Basic Black inkpad.
Stamp Sets: Basic Phrases, A Kind Word (retired)
Tools and other fun stuff: Vintage Wallpaper embossing folder, Pear Pizazz poly-stitched ribbon, Scallop Border punch, Word Window punch, watercolour pencils, aquabrush.
Saturday, January 29, 2011
Gray, blue and purple?
I came accross this colour combination at Color Lab and it's one I would never have thought of using of my own accord.
The challenge was to use Bashful Blue, Perfect Plum and Basic Grey. Now, I've had three sheets of Perfect Plum since May last year and have never used them as purple just isn't really my colour, so today it finally got to see the light of day! I actually made two cards with it, the second one I will show you tomorrow. The other colour I've never had a chance to use before is Basic Grey so am pleased I got a chance to try it today.
I really like the stamp set I used, Loads of Love, I used it to make some Christmas cards last year, and my daughter has taken ownership of a Valentines card I made with this set as well, now it's time to make a masculine card with it.
I also love my new Sizzlits die as I'll never run out of co-ordinating "buttons" thanks to it!
I took a series of photos as I made this card to show you how I did the checkerboard background (please excuse the rather well loved aka 'grotty' green cutting mat, after all I've had it for about 25 years..!) - here they are:
I cut six each Bashful Blue and Basic Grey 1 1/4" squares.
I placed them in the Vintage Wallpaper embossing folder in the order they would be glued onto the base card, I was hoping to achieve a continuous pattern by doing this.
Here they are after embossing.
Glueing them down on the Bashful Blue base card, start with the four corners, them fill in the edges and finally the middle two.
Here is the finalized checkerboard pattern.
Cutting my 'button's with the Sizzlits die in Perfect Plum. The black slivers are offcuts from other projects which I kept expressly to thread through the buttons to simulate thread.
I stamped the truck image on a scrap of Perfect Plum card and with some fussy cutting I ended up with a Perfect Plum truck! Much better I think.
What I used:
Card: Bashful Blue, Basic Grey, Perfect Plum, watercolour paper.
Ink: Basic Black
Stamp Sets: Loads of Love, Teeny Tiny Sentiments
Tools and other fun stuff: Buttons #5 Sizzlits die, Vintage Wallpaper embossing folder, corner rounder punch, Stampa-ma-jig, Stampin' Dimensionals, acquabrush.
The challenge was to use Bashful Blue, Perfect Plum and Basic Grey. Now, I've had three sheets of Perfect Plum since May last year and have never used them as purple just isn't really my colour, so today it finally got to see the light of day! I actually made two cards with it, the second one I will show you tomorrow. The other colour I've never had a chance to use before is Basic Grey so am pleased I got a chance to try it today.
I really like the stamp set I used, Loads of Love, I used it to make some Christmas cards last year, and my daughter has taken ownership of a Valentines card I made with this set as well, now it's time to make a masculine card with it.
I also love my new Sizzlits die as I'll never run out of co-ordinating "buttons" thanks to it!
I took a series of photos as I made this card to show you how I did the checkerboard background (please excuse the rather well loved aka 'grotty' green cutting mat, after all I've had it for about 25 years..!) - here they are:
I cut six each Bashful Blue and Basic Grey 1 1/4" squares.
I placed them in the Vintage Wallpaper embossing folder in the order they would be glued onto the base card, I was hoping to achieve a continuous pattern by doing this.
Here they are after embossing.
Glueing them down on the Bashful Blue base card, start with the four corners, them fill in the edges and finally the middle two.
Here is the finalized checkerboard pattern.
Cutting my 'button's with the Sizzlits die in Perfect Plum. The black slivers are offcuts from other projects which I kept expressly to thread through the buttons to simulate thread.
First I coloured the pickup truck using watercolour pencils and the truck ended looking rather pink. I slept on it and this morning I had another go at it and here is the result of my "adjustments":
I stamped the truck image on a scrap of Perfect Plum card and with some fussy cutting I ended up with a Perfect Plum truck! Much better I think.
What I used:
Card: Bashful Blue, Basic Grey, Perfect Plum, watercolour paper.
Ink: Basic Black
Stamp Sets: Loads of Love, Teeny Tiny Sentiments
Tools and other fun stuff: Buttons #5 Sizzlits die, Vintage Wallpaper embossing folder, corner rounder punch, Stampa-ma-jig, Stampin' Dimensionals, acquabrush.
Sunday, January 23, 2011
Regal Rose Butterfly
I was actually planning on having a day off from cardmaking today, but it dawned dark and drizzly, just the perfect day to craft really! So I made a couple of projects, here is the first one.
Once again I used a sketch from Diva Coffee Break Design plus the colour scheme came from The Color Dare - I must say I found it a little bit tricky to work with these three colours, but I think I got there in the end thanks to the use of lots and lots of layers (tt's six layers deep by the time you get to the butterfly!).
You can see lots more of my cards on my Facebook page.
What I used:
Card: Pacific Point, Regal Rose, Pink Pirouette, White
Ink: Regal Rose, Pacific Point
Stamp Sets: Butterfly Prints
Tools and other fun stuff: Scallop Edge punch, Vintage Wallpaper embossing folder, Butterfly punch, Scalloped Oval pund, Wide Oval punch, Paper Piercing tool and mat, Stampin' Dimensionals, Stampin' sponges, Basic Pearls.
Once again I used a sketch from Diva Coffee Break Design plus the colour scheme came from The Color Dare - I must say I found it a little bit tricky to work with these three colours, but I think I got there in the end thanks to the use of lots and lots of layers (tt's six layers deep by the time you get to the butterfly!).
You can see lots more of my cards on my Facebook page.
What I used:
Card: Pacific Point, Regal Rose, Pink Pirouette, White
Ink: Regal Rose, Pacific Point
Stamp Sets: Butterfly Prints
Tools and other fun stuff: Scallop Edge punch, Vintage Wallpaper embossing folder, Butterfly punch, Scalloped Oval pund, Wide Oval punch, Paper Piercing tool and mat, Stampin' Dimensionals, Stampin' sponges, Basic Pearls.
Saturday, January 22, 2011
Eastern Blooms for a friend
Hi again! Hope your weekend has started well. Carlos has been busy this morning finishing off the first coat of paint on the house as they have announced heavy rains for later today, it's looking rather grim out there right now actually, dark clouds everywhere.... good day for crafting though!
I've just finished this card 10 minutes ago, I followed another Clean and Simple sketch AND a Color Lab challenge as well - this is incredible! From being totally fazed by sketches I've embraced them wholeheartedly - after all they take the hard work out of card making, which for me is coming up with new ideas all the time! ( Sorry Color Lab, I don't have any More Mustard ink but thought the Pumpkin Pie was a pretty good substitute in this case).
I really enjoyed making this card, I must use that {friend to friend} sentiment more often!
If you'd like to join me on my Facebook page click on this link - look forward to seeing you over there.
What I used:
Card: Pacific Point, Very Vanilla, Old Olive
Ink: Old Olive and Pumpkin Pie Stampin' Write markers, Old Olive ink pad.
Stamp Sets: Eastern Blooms, Teeny Tiny Sentiments.
Tools and other fun stuff: Large Ornament punch, Scalloped Edge punch, Stampin' Dimensionals, Stampa-ma-jig, Vintage Wallpaper embossing folder.
I've just finished this card 10 minutes ago, I followed another Clean and Simple sketch AND a Color Lab challenge as well - this is incredible! From being totally fazed by sketches I've embraced them wholeheartedly - after all they take the hard work out of card making, which for me is coming up with new ideas all the time! ( Sorry Color Lab, I don't have any More Mustard ink but thought the Pumpkin Pie was a pretty good substitute in this case).
I really enjoyed making this card, I must use that {friend to friend} sentiment more often!
If you'd like to join me on my Facebook page click on this link - look forward to seeing you over there.
What I used:
Card: Pacific Point, Very Vanilla, Old Olive
Ink: Old Olive and Pumpkin Pie Stampin' Write markers, Old Olive ink pad.
Stamp Sets: Eastern Blooms, Teeny Tiny Sentiments.
Tools and other fun stuff: Large Ornament punch, Scalloped Edge punch, Stampin' Dimensionals, Stampa-ma-jig, Vintage Wallpaper embossing folder.
Tuesday, January 18, 2011
A little Pizazz for you
I am really liking this colour combination of Pumpkin Pie, Rose Red and Olive Green, with Very Vanilla to cool it down a little. When I first saw the Pumpkin Pie/Rose Red colour in a Stampin' Up! DSP I thought it was rather bright but now I'm really loving it!
I am just starting to get the hang of challenges or sketches and I saw a very do-able sketch this morning on Mojo Monday which I thought I'd try interpreting - hope you like the results!
What I used:
Card: Old Olive, Rose Red, Pumpkin Pie, Very Vanilla
Ink:Old Olive, Rose Red
Stamp sets: Petal Pizazz
Tools and other fun stuff: Scallop Border punch, Spellbinders Scallop Circles, Vintage Wallpaper embossing folder, Buttons Sizzlits die, Regal Rose grosgrain ribbon (retired), Old Olive 1/4" taffeta ribbon, Stampin' dimensionals.
I am just starting to get the hang of challenges or sketches and I saw a very do-able sketch this morning on Mojo Monday which I thought I'd try interpreting - hope you like the results!
What I used:
Card: Old Olive, Rose Red, Pumpkin Pie, Very Vanilla
Ink:Old Olive, Rose Red
Stamp sets: Petal Pizazz
Tools and other fun stuff: Scallop Border punch, Spellbinders Scallop Circles, Vintage Wallpaper embossing folder, Buttons Sizzlits die, Regal Rose grosgrain ribbon (retired), Old Olive 1/4" taffeta ribbon, Stampin' dimensionals.
Subscribe to:
Posts (Atom)