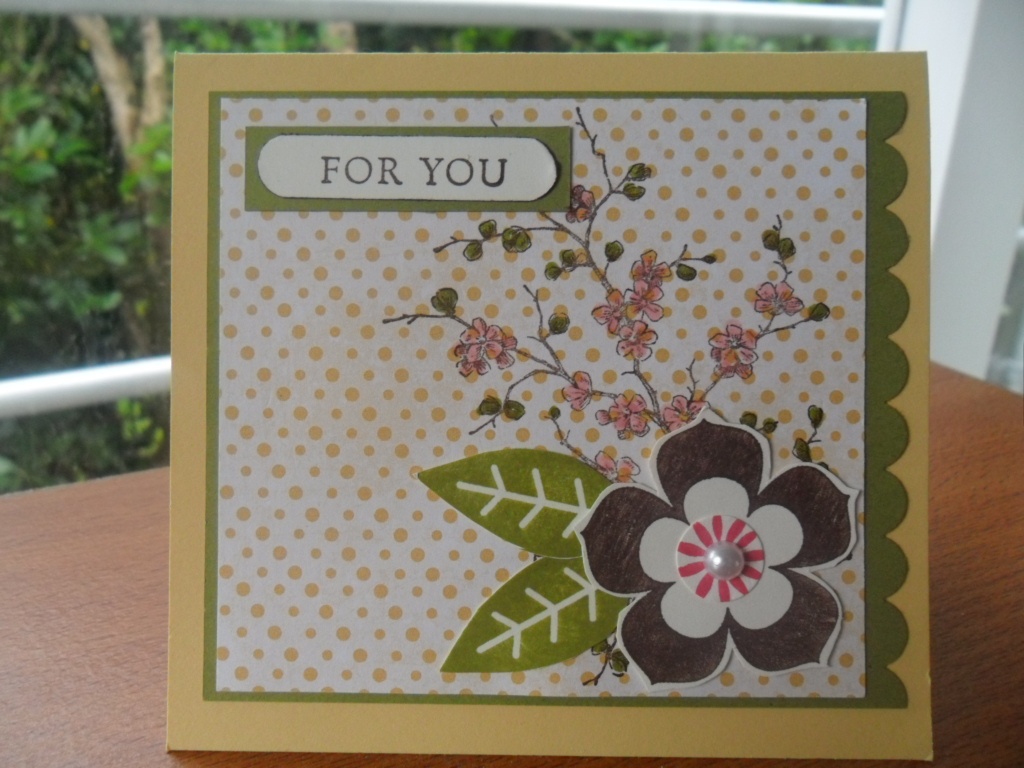
Here is a card I made using the sketch from the Stamping 411 blog, featuring a couple of stamp sets which retire very soon!
I must be in a 'spring' frame of mind as I choose really cheerful colours today, it is a beautiful (windy) day here in Wellington and it was lovely to be able to sit in the sun for a couple of minutes, without feeling cold, while my little boy played on the slide after kindy this morning.
I stamped the flower image randomly on white card with three ink colours, then punched them out and arranged them on an embossed green card. I lined up the 'hello' greeting using the Stamp-a-Majig - invaluable for this sort of stamping, when you want things neatly in rows.
What I used:
Card: Tempting Turquoise, White, green
Ink: Daffodil Delight, Rose Red, Tempting Turquoise
Stamp sets: Petal Pizazz, Basic Phrases
Tools and other fun stuff: Scalloped Square punch, Square Lattice embossing folder, Stamp-a-Majig.
Showing posts with label Petal Pizazz. Show all posts
Wednesday, August 24, 2011
Monday, August 15, 2011
Samples of soon-to-retire products - Petal Pizazz
Just thought I'd show you some samples of cards I made with the Petal Pizazz set which retires at the end of the month.
If you love bold coloured images this set is for you! I've loved using it and am sad it is retiring, but on the bright side there will be lots of new sets to fall in love with in the new catalogue due out on 1st September.
Another update on sold out products from the Last Chance list:
If there is anything you need to purchase before the retire/sell out please get in touch with me as soon as possible.
If you love bold coloured images this set is for you! I've loved using it and am sad it is retiring, but on the bright side there will be lots of new sets to fall in love with in the new catalogue due out on 1st September.
Another update on sold out products from the Last Chance list:
- Stamp: Sanded
- Stamp: Full Calendar
- Stamp set: Garden Whimsy
- Stamp set: Choo choo
- 12"x12" Card: Bashful Blue
- 12"x12" Card: Rich Razzleberry
- 12"x12" Card: Chocolate Chip
- 12"x12" Card: Crumb Cake
- 12"x12" Card: Very Vanilla
- 12"x12" Card: Early Espresso
- 12"x12" Card: Night of Navy
- 12"x12" Card: Marina Mist
- Punch: Spiral
- Punch: Corner
- Punch: Large Star
- Punch: 1 3/8" x 5/8" Oval
- Embellishments: Pewter Jumbo Eyelets
- Embellishments: Antique Brass Jumbo Eyelets
- Embellishments: Metallic Eyelets
If there is anything you need to purchase before the retire/sell out please get in touch with me as soon as possible.
Thursday, May 26, 2011
Happy Retirement Jo!
Our local Plunket nurse has just retired, so I wanted to make her a card to thank her for all her kindness when I used to take Leo for his checks. It's great that she lives locally too, as I get to see her in the supermarket quite often so we won't lose touch.
This card started off as an exercise in using my new Framed Tulips embossing folder to make smaller borders, the white card is 4" x 4" and it worked really well.
The great thing about embossing folders is you can use either side of the resulting embossed card, today I chose to use what is officially the 'reverse' side of it, so technically it's debossed, not embossed!
What I used:
Card: Pumpkin Pie, Whisper White, Chocolate Chip
Ink: Riding Hood Red, Pumpkin Pie, Always Artichoke
Stamp Sets: Petal Pizazz, Teeny Tiny Sentiments
Tools and other fun stuff: Scalloped Circle punch, Buttons #5 Sizzlets die, Framed Tulips embossing folder, Stampin' dimensionals, Stampin' sponges, Stamp-a-majig
This card started off as an exercise in using my new Framed Tulips embossing folder to make smaller borders, the white card is 4" x 4" and it worked really well.
The great thing about embossing folders is you can use either side of the resulting embossed card, today I chose to use what is officially the 'reverse' side of it, so technically it's debossed, not embossed!
What I used:
Card: Pumpkin Pie, Whisper White, Chocolate Chip
Ink: Riding Hood Red, Pumpkin Pie, Always Artichoke
Stamp Sets: Petal Pizazz, Teeny Tiny Sentiments
Tools and other fun stuff: Scalloped Circle punch, Buttons #5 Sizzlets die, Framed Tulips embossing folder, Stampin' dimensionals, Stampin' sponges, Stamp-a-majig
Friday, May 20, 2011
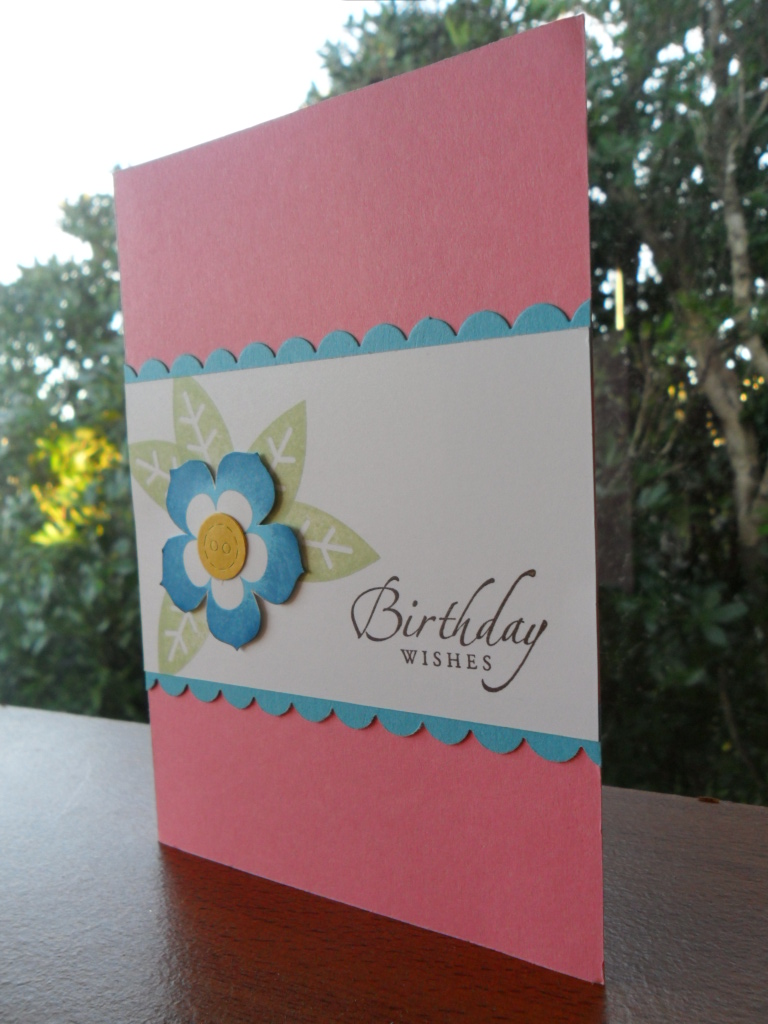
CAS Birthday card
Lovely sunny day here today so felt inspired to go looking for a challenge and found one at the Clean and Simple blog - hope you like it - pretty and feminine was the outcome today!
What I used:
Card: Regal Rose, Whisper White, Tempting Turquoise, Daffodil Delight
Ink: Tempting Turquoise, Pacific Point, Certainly Celery, Chocolate Chip
Stamp Sets: Petal Pizazz, Sincere Salutations
Tools and other fun stuff: Stamp-a-Majig, Stampin' dimensionals, Scallop Border punch. Buttons #5 Sizzlits die
What I used:
Card: Regal Rose, Whisper White, Tempting Turquoise, Daffodil Delight
Ink: Tempting Turquoise, Pacific Point, Certainly Celery, Chocolate Chip
Stamp Sets: Petal Pizazz, Sincere Salutations
Tools and other fun stuff: Stamp-a-Majig, Stampin' dimensionals, Scallop Border punch. Buttons #5 Sizzlits die
Sunday, May 8, 2011
Happy Mothers' Day to all!
I would like to take this opportunity to wish all the mothers out there who may stumble across this message a very happy Mothers' Day! Hope your day is a special one, and that the pampering is not only restricted to today!
A few days ago I was once again having a play with the Framed Tulips embossing folder, trying to figure out a way to have the base card showing around it. It is possible, but it means you have to cut your base card slightly wider than the average A4 size - the dimensions I used for my red background worked out to be 8 7/8" x 5 3/4". I originally cut it at 9" but then found it would not fit a C6 envelope, so trimmed a teeny bit off and it worked perfectly. It does mean you have to cut your base lengthways if using an A4 sheet, but that's the price for getting it exactly as I wanted it!
Had lots of fun with this one, it evolved throughout the morning (good thing my mum is away for a couple of days!) I started off by embossing a piece of Soft Suede (4" x 5 1/4"), then I applied Versamark ink to the edges where the tulips are, added gold embossing powder and heat-set it - it ended up looking like an antique gilded picture frame! Using the Petal Pizazz stamp set I stamped three flowers in Pumpkin Pie and Cherry Cobbler, sponged the edges with Riding Hood Red. Stamped a few leaves in Old Olive, cut them out, sponged the edges again, found some Riding Hood Red buttons in my stash, added those to the flowers as centres. After assembling all the layers and flowers all that was needed was a sentiment.
Tip of the day! Do not lay your card to be heat embossed on your self-healing cutting mat when applying heat!!! I almost ruined my 25+ year old mat, luckily I realized just in time and was able to reverse the buckling by placing a heavy item on top of it as it cooled down....
What I used:
Card: Riding Hood Red, Soft Suede, Very Vanilla
Ink: Old Olive, Riding Hood Red, Pumpkin Pie, Cherry Cobler
Stamp Sets: Petal Pizazz, Teeny Tiny Sentiments
Tools and other fun stuff: Scallop Circle punch, Buttons #5 Sizzlets die, Framed Tulip embossing folder, embossing buddy, heat gun, gold embossing powder, Stampin' sponges, Stamp-a-majig
A few days ago I was once again having a play with the Framed Tulips embossing folder, trying to figure out a way to have the base card showing around it. It is possible, but it means you have to cut your base card slightly wider than the average A4 size - the dimensions I used for my red background worked out to be 8 7/8" x 5 3/4". I originally cut it at 9" but then found it would not fit a C6 envelope, so trimmed a teeny bit off and it worked perfectly. It does mean you have to cut your base lengthways if using an A4 sheet, but that's the price for getting it exactly as I wanted it!
Had lots of fun with this one, it evolved throughout the morning (good thing my mum is away for a couple of days!) I started off by embossing a piece of Soft Suede (4" x 5 1/4"), then I applied Versamark ink to the edges where the tulips are, added gold embossing powder and heat-set it - it ended up looking like an antique gilded picture frame! Using the Petal Pizazz stamp set I stamped three flowers in Pumpkin Pie and Cherry Cobbler, sponged the edges with Riding Hood Red. Stamped a few leaves in Old Olive, cut them out, sponged the edges again, found some Riding Hood Red buttons in my stash, added those to the flowers as centres. After assembling all the layers and flowers all that was needed was a sentiment.
Tip of the day! Do not lay your card to be heat embossed on your self-healing cutting mat when applying heat!!! I almost ruined my 25+ year old mat, luckily I realized just in time and was able to reverse the buckling by placing a heavy item on top of it as it cooled down....
What I used:
Card: Riding Hood Red, Soft Suede, Very Vanilla
Ink: Old Olive, Riding Hood Red, Pumpkin Pie, Cherry Cobler
Stamp Sets: Petal Pizazz, Teeny Tiny Sentiments
Tools and other fun stuff: Scallop Circle punch, Buttons #5 Sizzlets die, Framed Tulip embossing folder, embossing buddy, heat gun, gold embossing powder, Stampin' sponges, Stamp-a-majig
Sunday, April 3, 2011
Make and takes
I held my first stall at a school fair yesterday and it was a very interesting experience! Sold a few cards, had a couple of leads, I enjoyed it. (My typing is a little limited today so this will be brief!)
Here are the 'make and takes' I made for this occasion.
What I used:
Card: Cherry Cobbler, So Saffron, Very Vanilla
Ink: Old Olive, Pumpkin Pie, Cherry Cobbler
Stamp sets: Petal Pizazz, Teeny Tiny Sentiments, Butterfly Prints, Easter Blossoms (from Summer Mini)
Tools and other fun stuff: Scallop Circle punch, Butterfly Punch, Large Oval punch, Scalloped Oval punch, Vintage Wallpaper embossing folder, Basic Pearls, Rhinestones.
Here are the 'make and takes' I made for this occasion.
What I used:
Card: Cherry Cobbler, So Saffron, Very Vanilla
Ink: Old Olive, Pumpkin Pie, Cherry Cobbler
Stamp sets: Petal Pizazz, Teeny Tiny Sentiments, Butterfly Prints, Easter Blossoms (from Summer Mini)
Tools and other fun stuff: Scallop Circle punch, Butterfly Punch, Large Oval punch, Scalloped Oval punch, Vintage Wallpaper embossing folder, Basic Pearls, Rhinestones.
Friday, February 4, 2011
Box of tricks
I know I tend to focus on cards because I love making them, but of course there are so many things to can do with a piece of gorgeous card or paper. I am yet to make my first scrapbook page (well, I have made a scrapbook before but more on at a later date), but the other avenue I need to explore a little more is 3D papercrafts. As I was tidying up my craft area the other day it dawned on me that I had a project there that I had not shared with anyone yet, and I really like it as it is useful and practical!
Some time ago I needed a container for my bits and pieces so I cut down an empty box and covered and decorated it. What I used to cover the base was the paper that Stampin' Up! uses to pack its orders with, I crumpled it up and then smoothed it out, patted the Old Olive ink pad over it to highlight the creases and covered my box. Then I stamped some Petal Pizazz flowers and leaves, cut them out and glued them securely to it - and it was ready!
I used the 'rock'n'roll' technique for two of the flowers - I can demonstrate it in your next workshop if you like!
What I used:
Card: Very Vanilla, Stampin' Up! packing paper
Ink: Old Olive, Rose Red, So Safron, Chocolate Chip, Certainly Celery
Stamp Set: Petal Pizazz
Tools and other fun stuff: Scissors, glue.
Some time ago I needed a container for my bits and pieces so I cut down an empty box and covered and decorated it. What I used to cover the base was the paper that Stampin' Up! uses to pack its orders with, I crumpled it up and then smoothed it out, patted the Old Olive ink pad over it to highlight the creases and covered my box. Then I stamped some Petal Pizazz flowers and leaves, cut them out and glued them securely to it - and it was ready!
I used the 'rock'n'roll' technique for two of the flowers - I can demonstrate it in your next workshop if you like!
What I used:
Card: Very Vanilla, Stampin' Up! packing paper
Ink: Old Olive, Rose Red, So Safron, Chocolate Chip, Certainly Celery
Stamp Set: Petal Pizazz
Tools and other fun stuff: Scissors, glue.
Tuesday, January 18, 2011
A little Pizazz for you
I am really liking this colour combination of Pumpkin Pie, Rose Red and Olive Green, with Very Vanilla to cool it down a little. When I first saw the Pumpkin Pie/Rose Red colour in a Stampin' Up! DSP I thought it was rather bright but now I'm really loving it!
I am just starting to get the hang of challenges or sketches and I saw a very do-able sketch this morning on Mojo Monday which I thought I'd try interpreting - hope you like the results!
What I used:
Card: Old Olive, Rose Red, Pumpkin Pie, Very Vanilla
Ink:Old Olive, Rose Red
Stamp sets: Petal Pizazz
Tools and other fun stuff: Scallop Border punch, Spellbinders Scallop Circles, Vintage Wallpaper embossing folder, Buttons Sizzlits die, Regal Rose grosgrain ribbon (retired), Old Olive 1/4" taffeta ribbon, Stampin' dimensionals.
I am just starting to get the hang of challenges or sketches and I saw a very do-able sketch this morning on Mojo Monday which I thought I'd try interpreting - hope you like the results!
What I used:
Card: Old Olive, Rose Red, Pumpkin Pie, Very Vanilla
Ink:Old Olive, Rose Red
Stamp sets: Petal Pizazz
Tools and other fun stuff: Scallop Border punch, Spellbinders Scallop Circles, Vintage Wallpaper embossing folder, Buttons Sizzlits die, Regal Rose grosgrain ribbon (retired), Old Olive 1/4" taffeta ribbon, Stampin' dimensionals.
Subscribe to:
Posts (Atom)